🚀 Getting Started with MapBilling
This guide walks you through your first session in MapBilling, from logging in to finding your first record — step by step.
New to the platform overview? Read Introduction first for the big picture, then come back here to get hands-on.
🧭 Before You Begin
Make sure you have:
- ✅ A MapBilling account (username/email and password)
- ✅ Your assigned role (Field Worker, Billing Officer, Manager, or Administrator)
If you don't have login details yet, contact your system administrator.
Your organization is set up as a Water utility, a Waste (Garbage) service, or Other — this is configured by your administrator and determines which module you see. You don't switch between them; it's fixed for your account.
🪜 Step-by-Step Setup
Step 1 — Log In
Open MapBilling in your browser and sign in with your credentials.
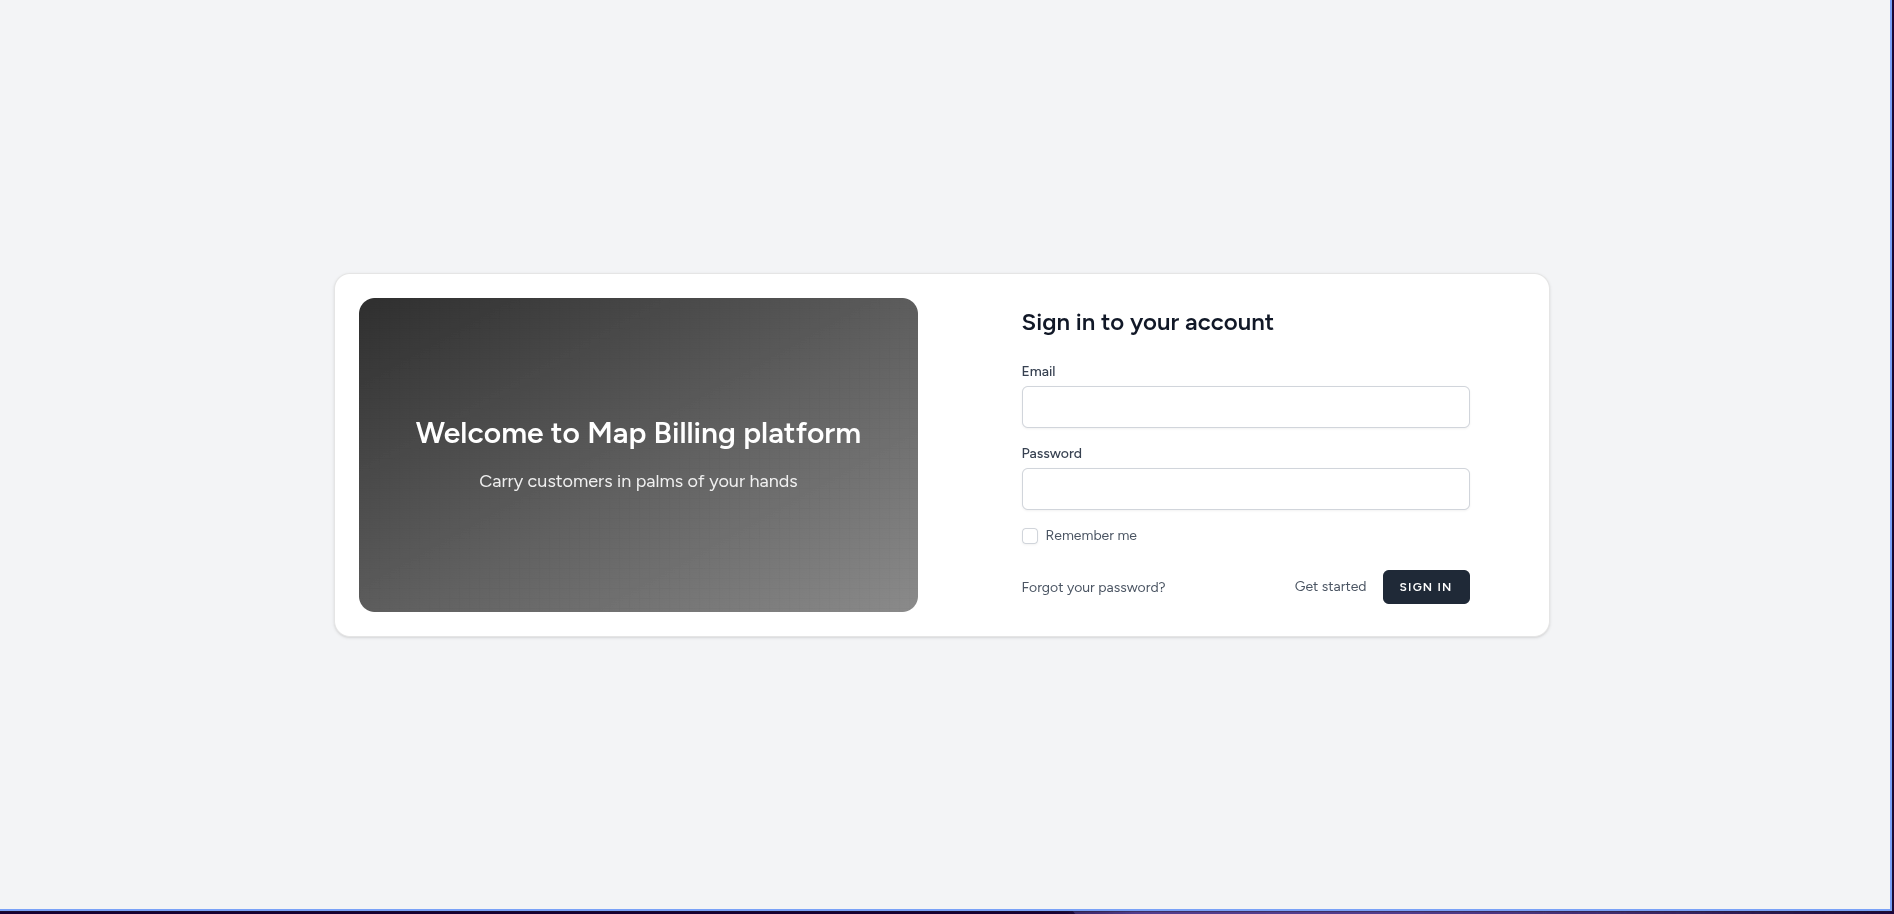
✔ You should land on the Dashboard.
Step 2 — Get Familiar With Your Workspace
Your account is provisioned for one service type, and the navigation reflects it.
| Your Organization Type | You'll see |
|---|---|
| 💧 Water utility | Billing Points, Assets, Meters, Customers, Invoices & Payments, Tasks |
| 🗑️ Waste (Garbage) | Billing Points, Garbage History, Customers, Invoices & Payments |
| Other | Modules configured for your service |
The Map and Dashboard work the same way across every account type.
Not sure what your organization is set up as? Ask your administrator.
Step 3 — Explore the Dashboard
The Dashboard is your starting point every time you log in.
It shows:
- 📍 What is happening right now
- ⚡ What needs attention
- 📊 How your area is performing
📖 See Dashboard Overview for a full breakdown.
Step 4 — Open the Map
Every billing point in MapBilling is tied to a location. The map is where you'll spend most of your time.
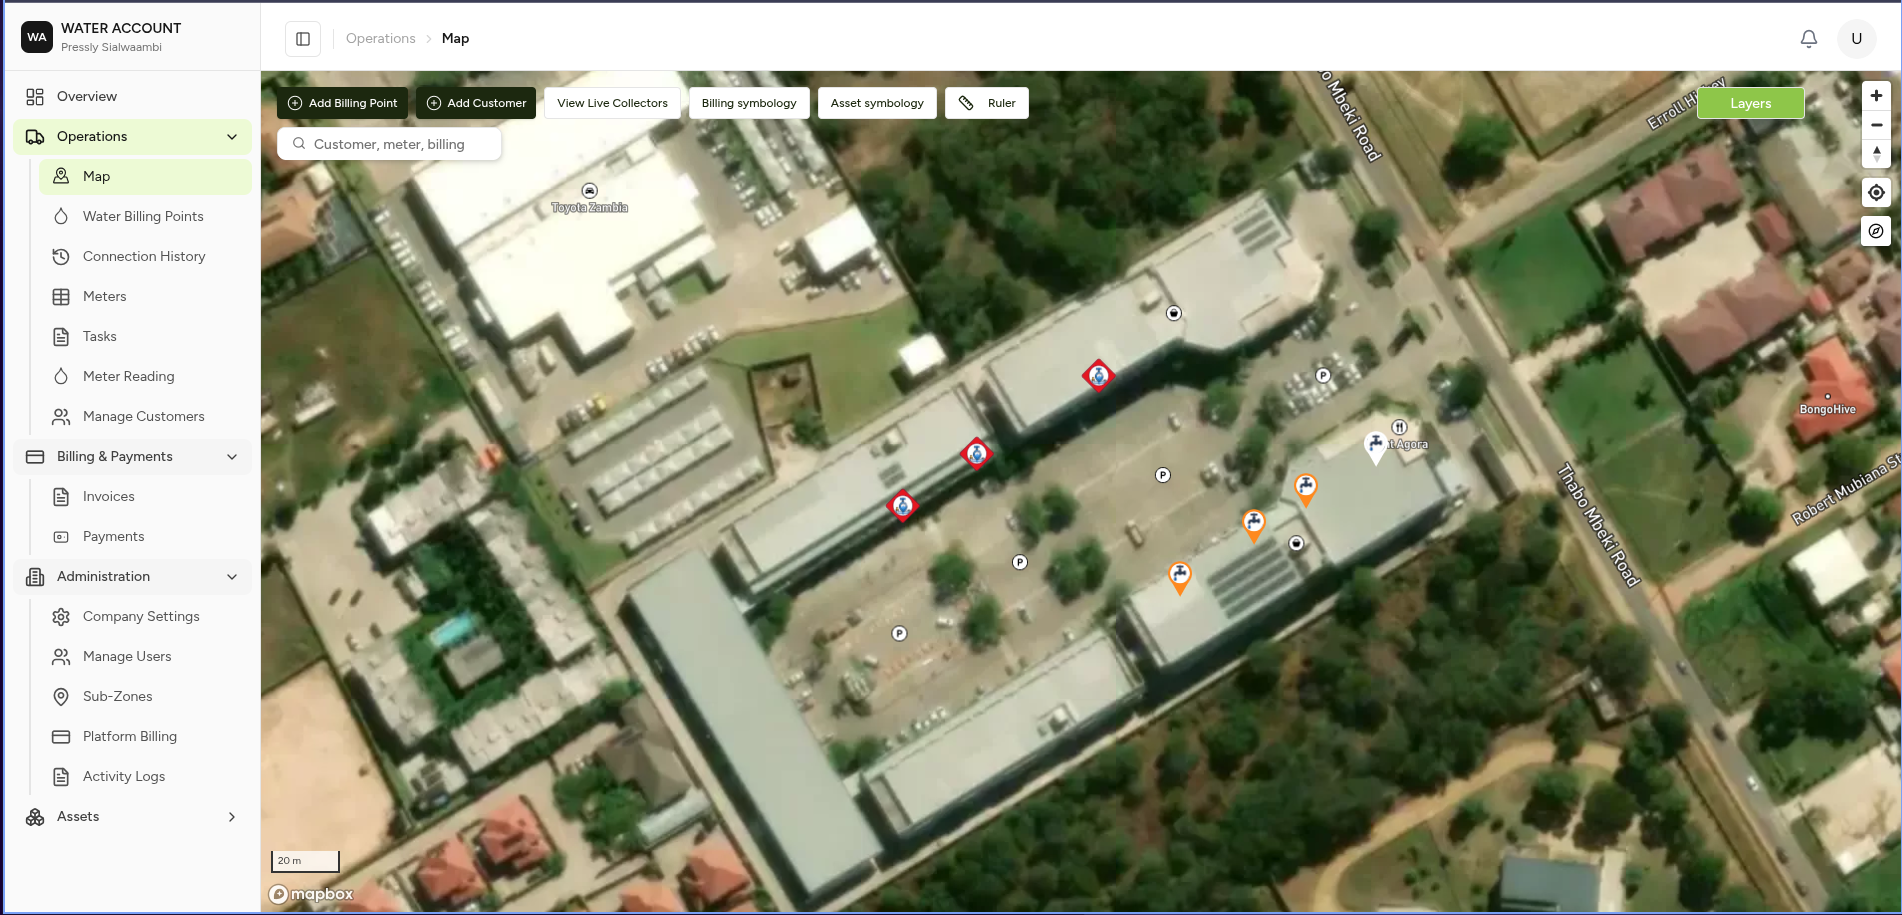
Try this:
- Open Map
- Toggle a layer (Water or Waste)
- Click any billing point to view its details
- Use filters to narrow what you see
📖 See Maps Overview for the full guide.
Step 5 — Find (or Create) Your First Billing Point
What you do first depends on your organization type.
💧 If you're a Water utility
Water infrastructure (meters, pipes, tanks) comes into the system as Assets, uploaded rather than typed in by hand:
- Open Assets
- Click Upload, then add a GIS, CSV, Excel, or other spatial data file
- The system detects the asset type and adds it to your asset attributes
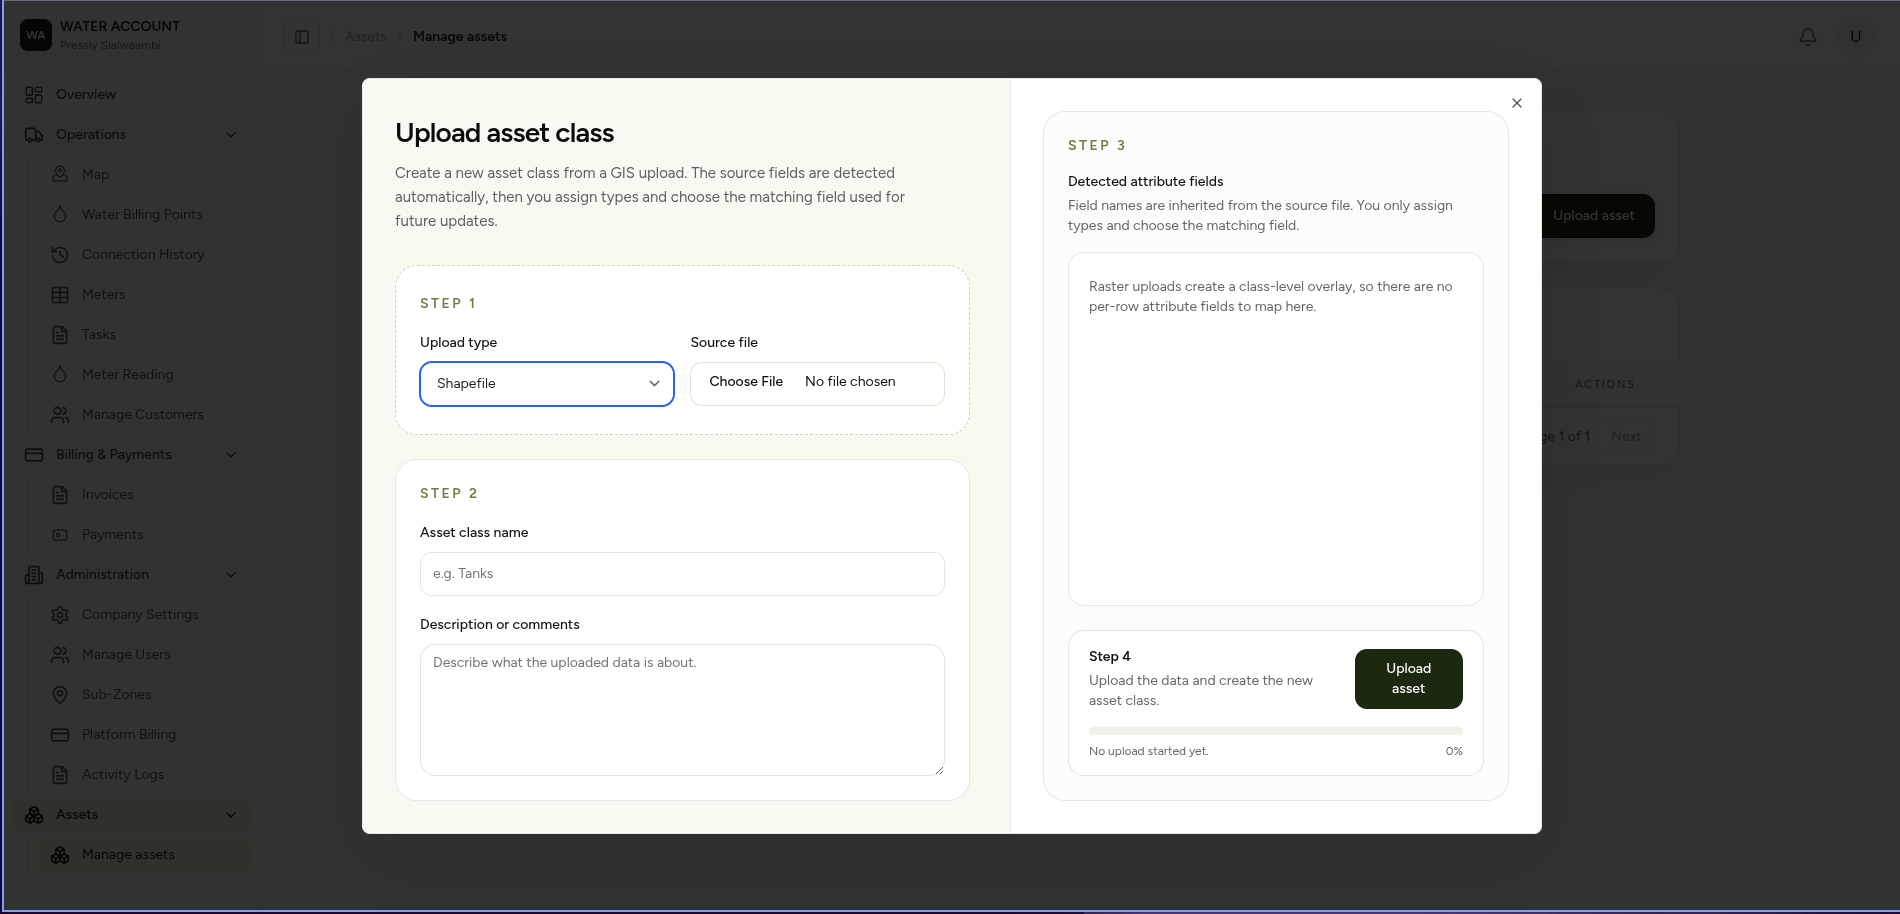
✔ Uploaded assets appear on the map in their correct location, are searchable, and get their own navigation item automatically.
📖 See Asset Management and Dynamic Asset Navigation for details.
Once your assets exist, service locations are managed as Water Billing Points — each one links a customer, a service address, and (for metered connections) a meter.
🗑️ If you're a Waste (Garbage) service
Waste has no GIS import step — a Garbage Billing Point is created directly by dropping a pin on the map:
- Open Map and click Add Billing Point
- Drag the pin to the exact service location and continue
- Search for or create the customer, then confirm
📖 See Creating a Billing Point for the full walkthrough.
Either way, once a billing point exists you can open it to see its customer, status, invoices, and history.
Step 6 — Go Deeper Into Your Module
Once you're comfortable with the basics, move on to the area you'll work in day to day.
- 💧 Water Management — billing points, assets, meters, customers, invoices, payments
- 🗑️ Waste Management — billing points, garbage history, customers, invoices, payments
🔄 Your First Session, Visually
flowchart TD

A[Log In] --> B[View Dashboard]
B --> C[Open Map]
C --> D[Find or Create a Billing Point]
D --> E[Explore Water or Waste Module]
👥 Guided Paths by Role
Pick the path that matches your role for a faster start.
👷 Field Worker
- Log in and open the Map
- Locate your assigned billing point (or meter, for Water)
- Complete an inspection, reading, or collection — using Water Works (Water) or in the field for Waste
- Capture photos or notes as needed
💰 Billing Officer
- Log in and open Billing Points (Water or Waste)
- Search for a customer or account
- Open Billing and Payments → Invoices to review invoice and payment status
- Record a payment against an invoice
📊 Manager
- Log in and open the Dashboard
- Review KPIs for your module
- Open the Map to check billing point status across your area
- Check Connection History (Water) or Garbage History (Waste) for recent activity
⚙️ Administrator
- Log in and open Administration
- Set up users, roles, and sub-zones
- Review activity logs
- Confirm company settings are correct
✅ What Success Looks Like
By the end of this guide, you should be able to:
- Log in and reach the Dashboard
- Recognize the modules available for your organization type
- Open the Map and view billing points
- Find or create your first billing point (Water asset/meter or Waste billing point)
- Know where to go next for your role
💡 Next Steps
- 📖 Introduction — understand how MapBilling fits together
- 🗺️ Maps Overview
- 💧 Water Overview — includes Asset Management
- 🗑️ Waste Overview